Mesh Customization
1. Define your mesh specification
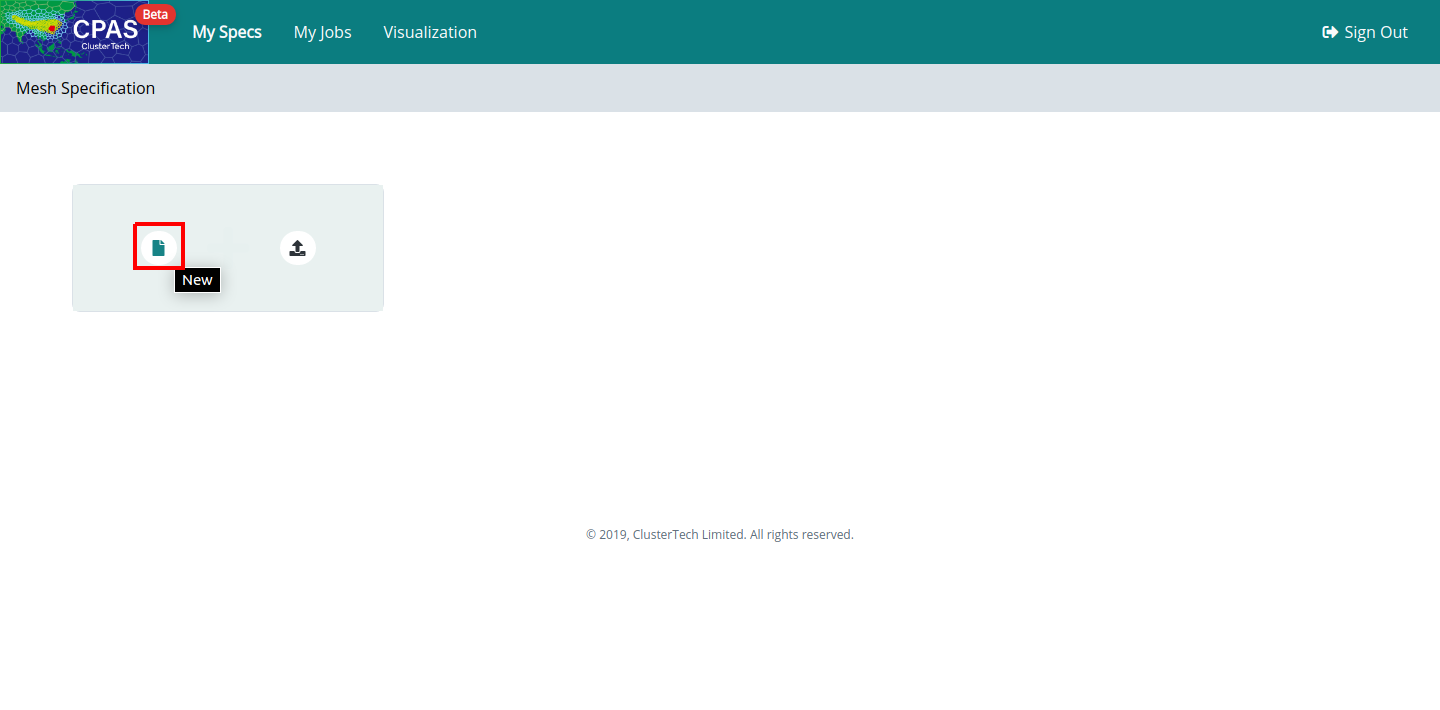
After sign in, you will be directed to the Mesh Specification page. Click the “New”![]() button to define a new mesh specification:
button to define a new mesh specification:
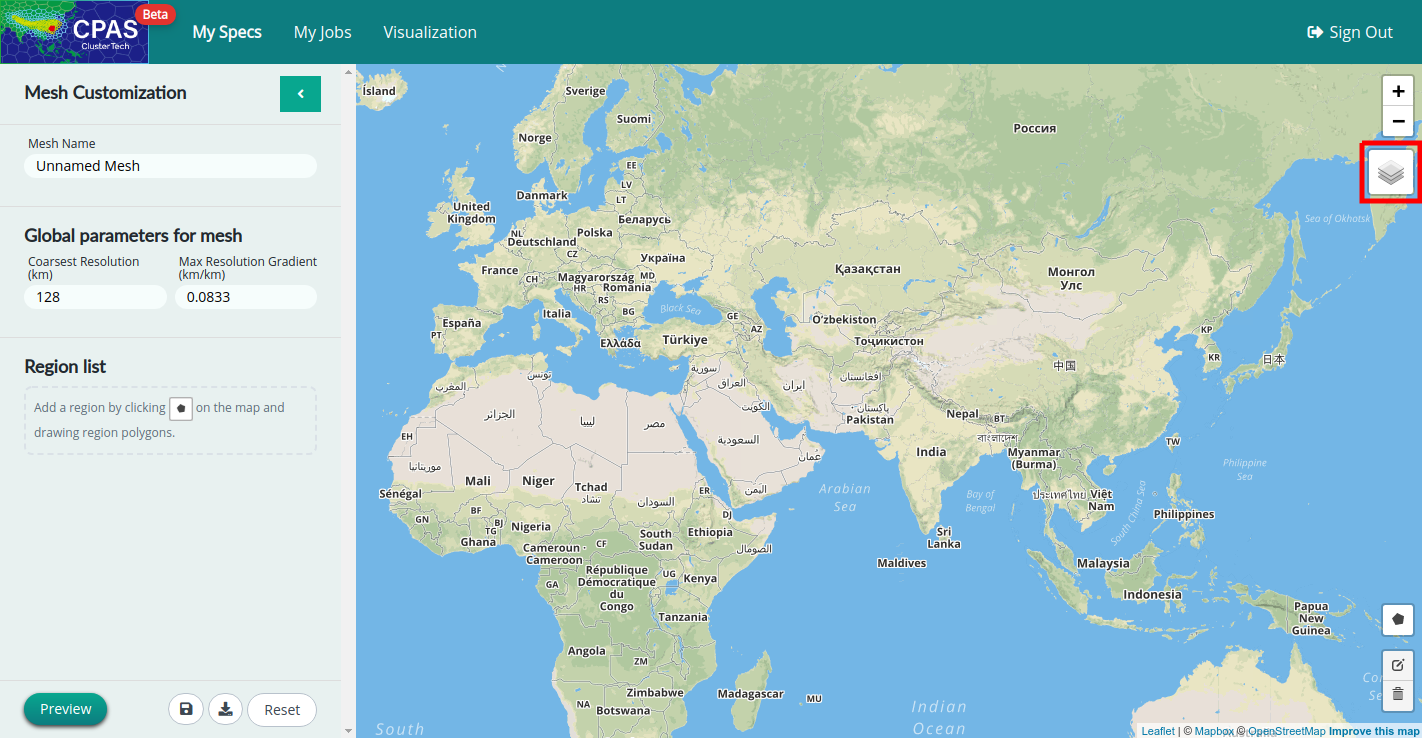
You will then enter the Mesh Customization page. The left and right are respectively the control panel and interactive map panel.
Before you start
You can choose the basemap from below:
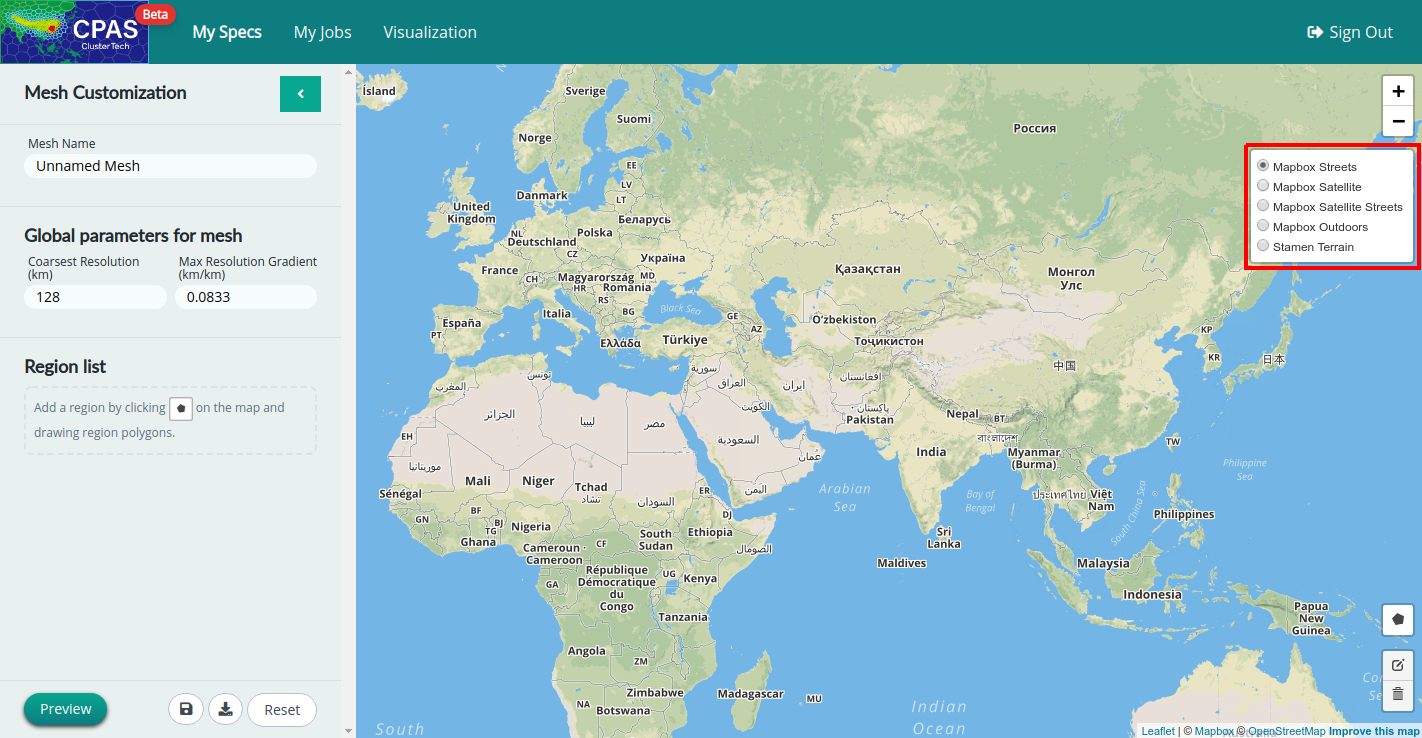
“Mapbox Streets” is the default map, showing legible styling of road and transit networks.

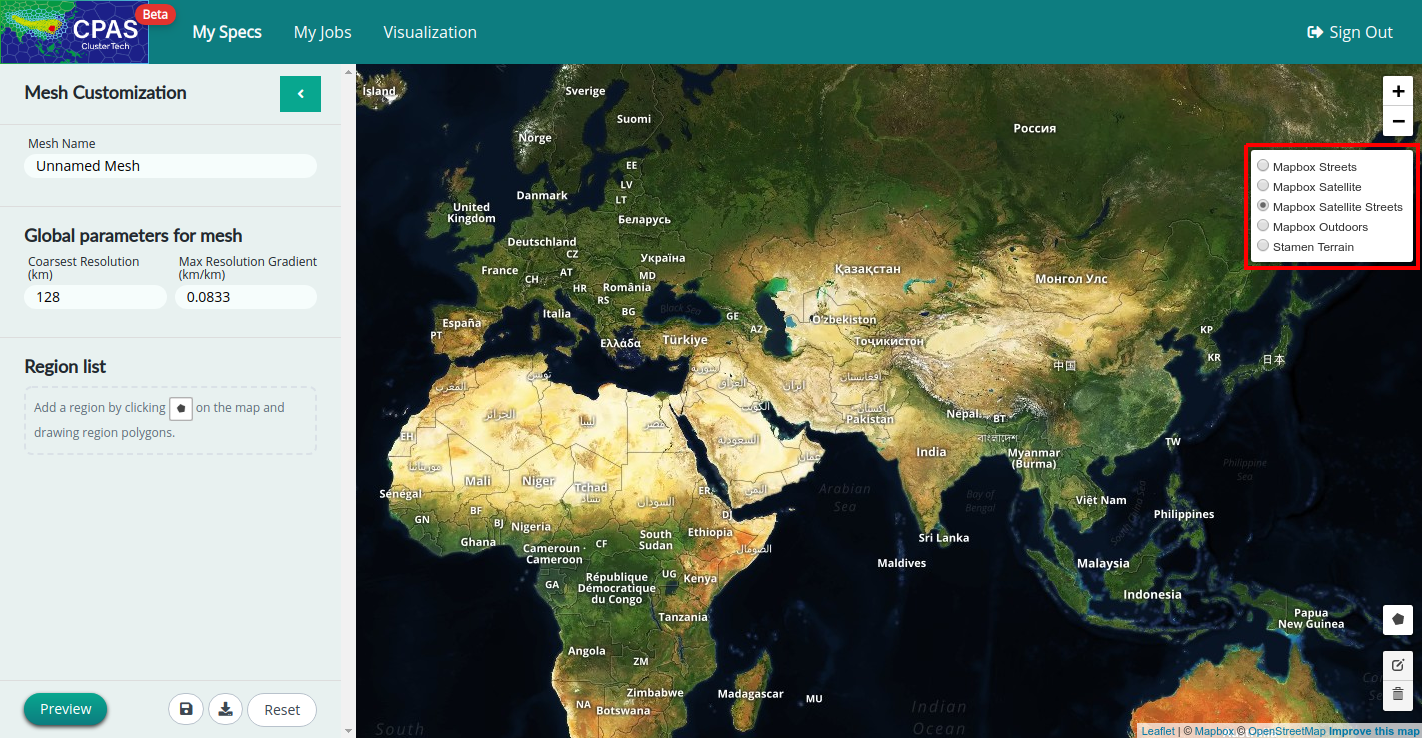
“Mapbox Satellite” and "Mapbox Satellite Streets" show aerial imagery of global satellite, which help you to differentiate land uses.
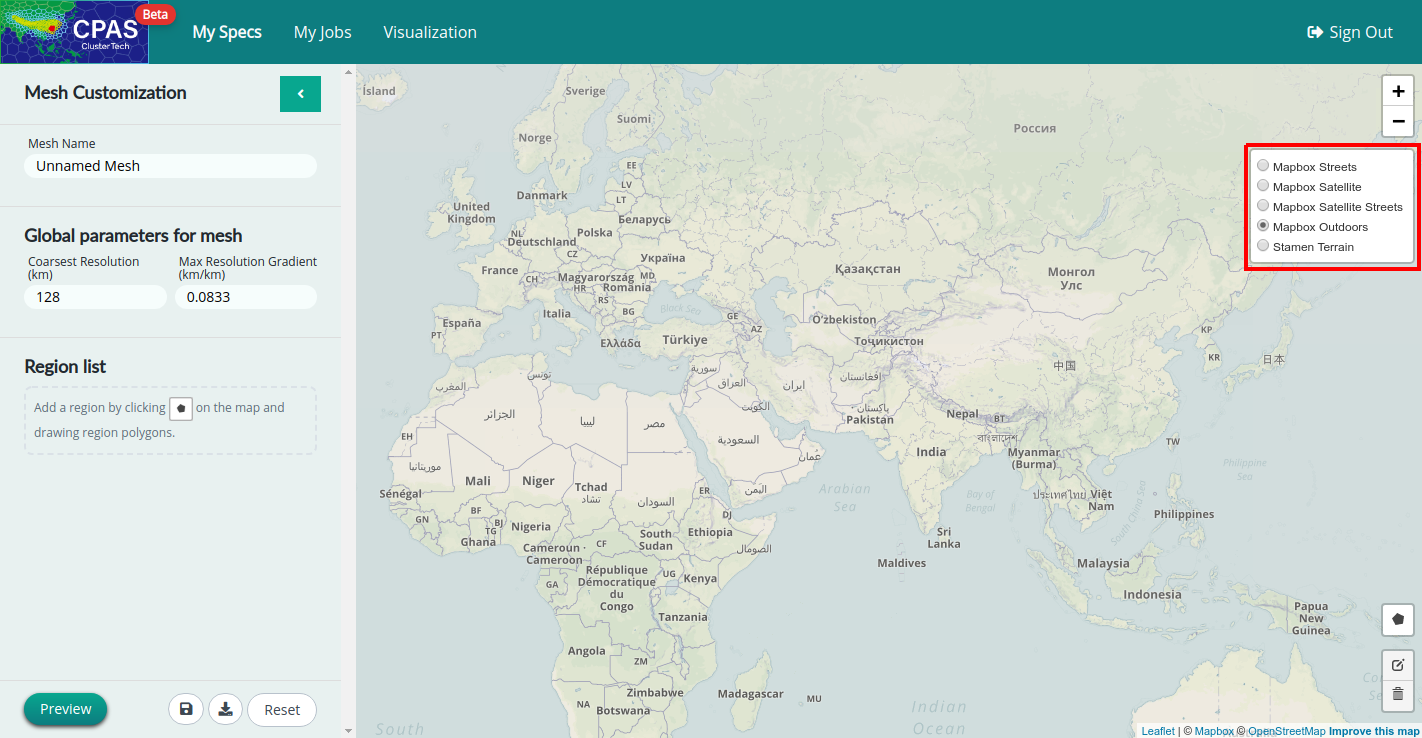
“Mapbox Outdoors” shows curated terrain with elevation and land cover.
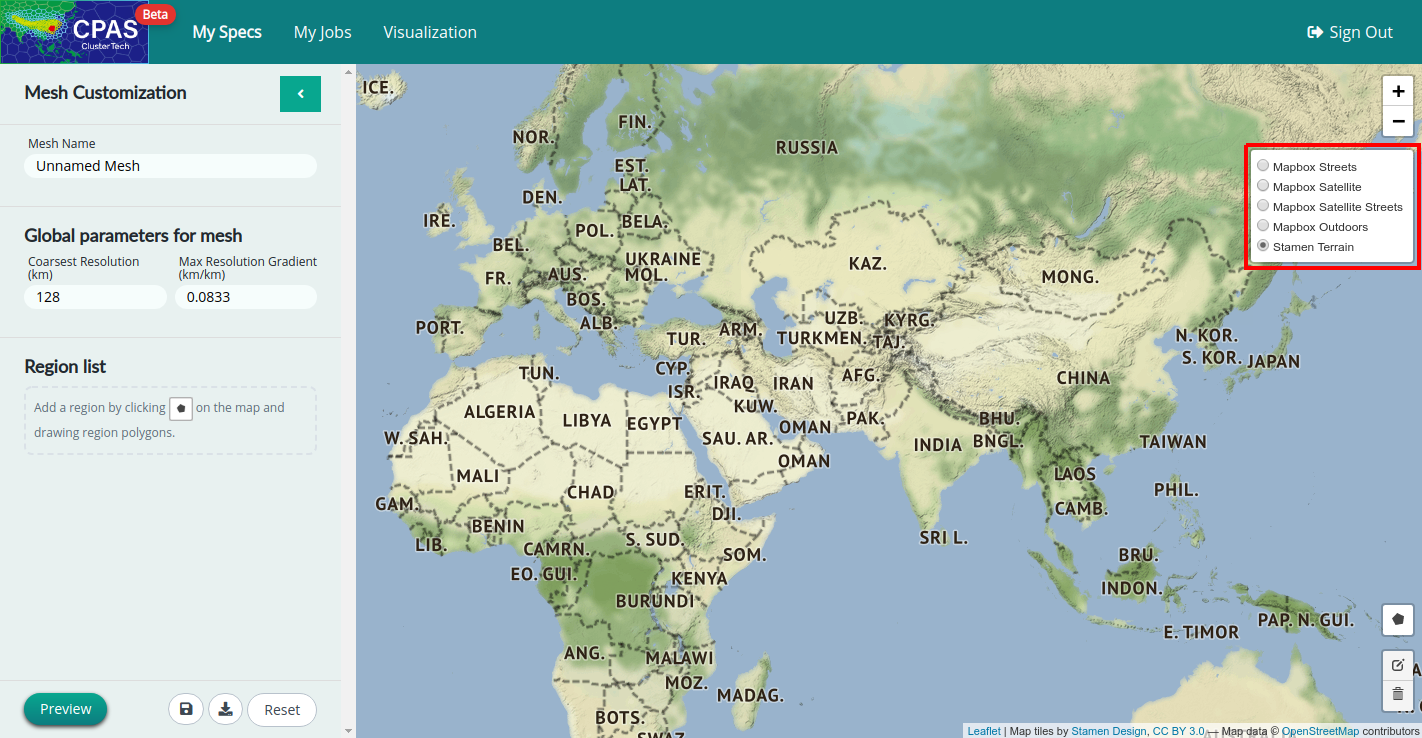
“Stamen Terrain” shows clear texture of terrain, which helps you to locate the mountains easily.
Step 1: Name your mesh
Fill in the “Mesh name” field.
Step 2: Set global parameters for your mesh
Specify parameters for the whole globe in the “Global parameters for mesh section” on the left panel.
The Earth's surface is divided into different regions. The parameters, e.g. coverage and resolutions, of the user-defined regions are specified by drawing polygons on the right panel (see Step 3 below). For the area outside user-defined regions, i.e. undefined regions, the parameters are specified by 'Coarsest Resolution' and 'Max Resolution Gradient'. These two parameters have default values setting for new users to evaluate CPAS’ features so you do not need to specify anything at first. You can adjust the values at any time before ordering the mesh.
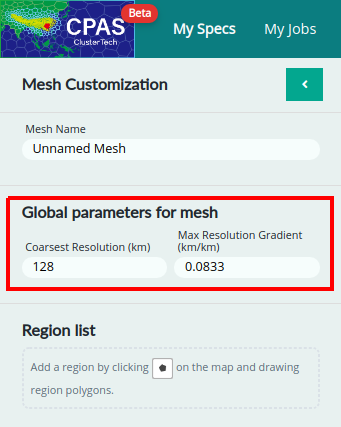
Coarsest Resolution (km) - The resolution you would like to set for the parts of the map outside of the user-defined regions. For regional/local short-range forecasts, the coarse resolution can be large, minimising computational cost. (Default: 128 km. Maximum: 480 km)
Max Resolution Gradient (km/km) - This is the largest rate of change in resolution with respect to distance. It acts as a limit for resolution transitions, ensuring that there are no abrupt changes of mesh spacing. The default value 0.0833 = 1/12 km/km means that a maximum 1 km-resolution change is allowed for every 12 km.
Step 3: Add the first region for your region of interest
Your region of interest could be a single city, a county or a province, or you may have hierarchical regions of interest.
The default target resolution for a region (4 km) allows new users to observe how extreme resolution variations are handled by hierarchical time-stepping (HTS). Note that the resolution and area coverage of the region greatly affect the number of cells generated. If you have a low limit on the number of cells (e.g. 50,000 cells for Free Subscription), either draw a small region (city or metapolis scale) or change the target resolution to a larger value (e.g. 16 km for a province).
a) Draw the region
Click the “Draw” ![]() button in the bottom right corner of the map panel.
button in the bottom right corner of the map panel.
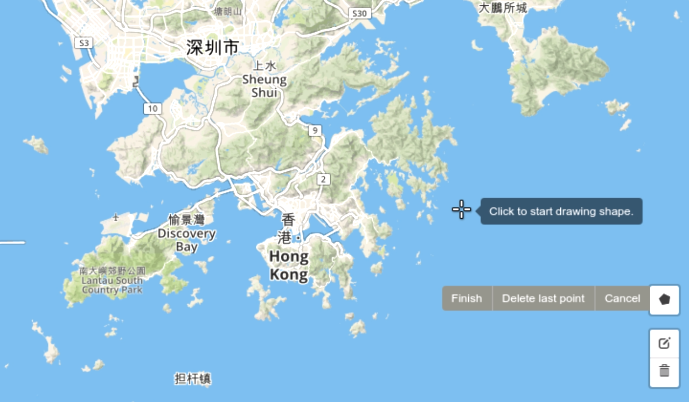
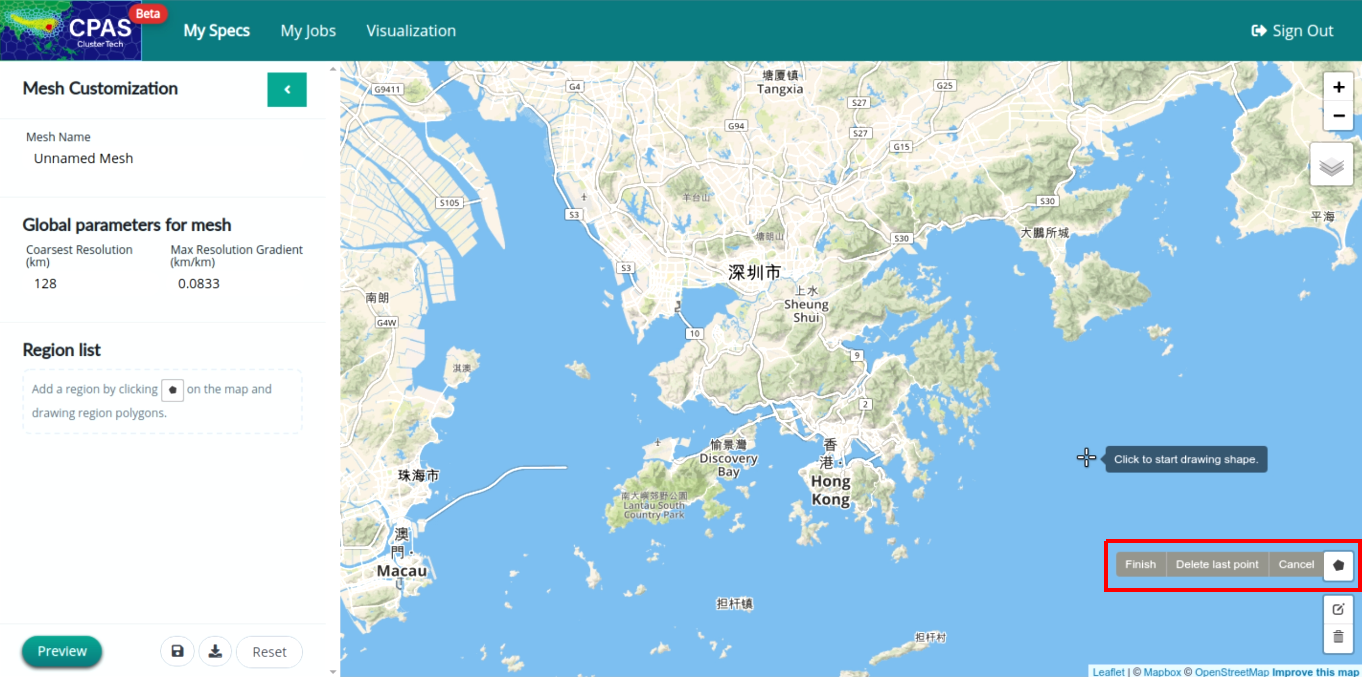
The pointer in the map panel will change to a white cross with hint "Click to start drawing shape", and three options will pop-up alongside simultaneously:
| "Finish" - Create a polygon by joining the first and last points automatically. |
| "Delete last point" - Remove the last point that is unexpectedly specified. |
| "Cancel" - Clear all changes of the current polygon. The cursor returns back to the original mouse cursor. |
Click on the map panel to mark the vertex of the polygon. An edge (solid line) will be created when two consecutive vertices are marked. Click the first point (or "Finish" in the pop-up) to complete the polygon.
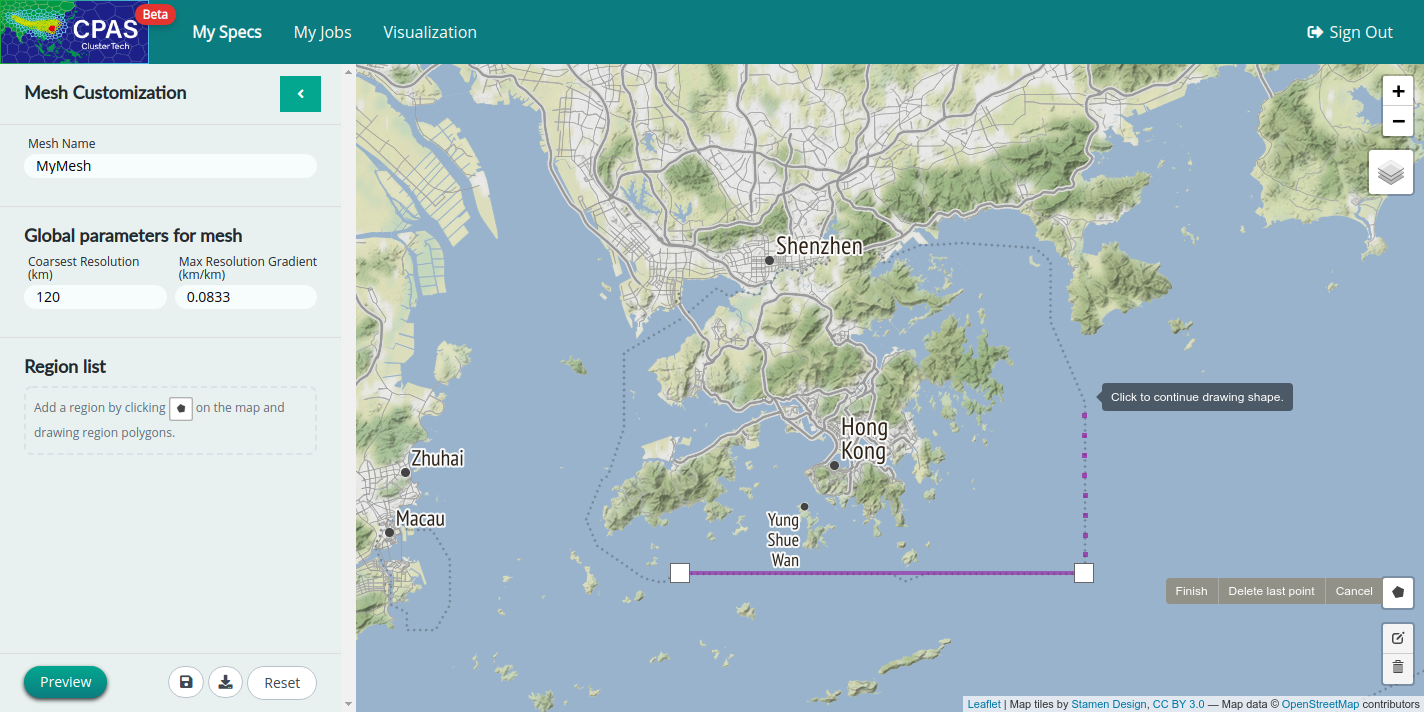
'Region list' and 'Parameters for region' will show up when a polygon is created. Name the region by filling “Region Name”.
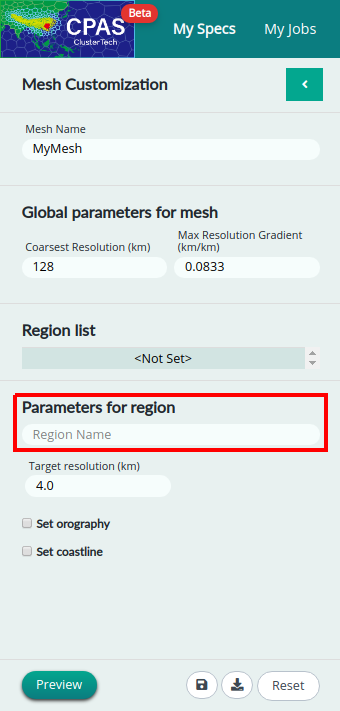
b) Specify parameters for the region
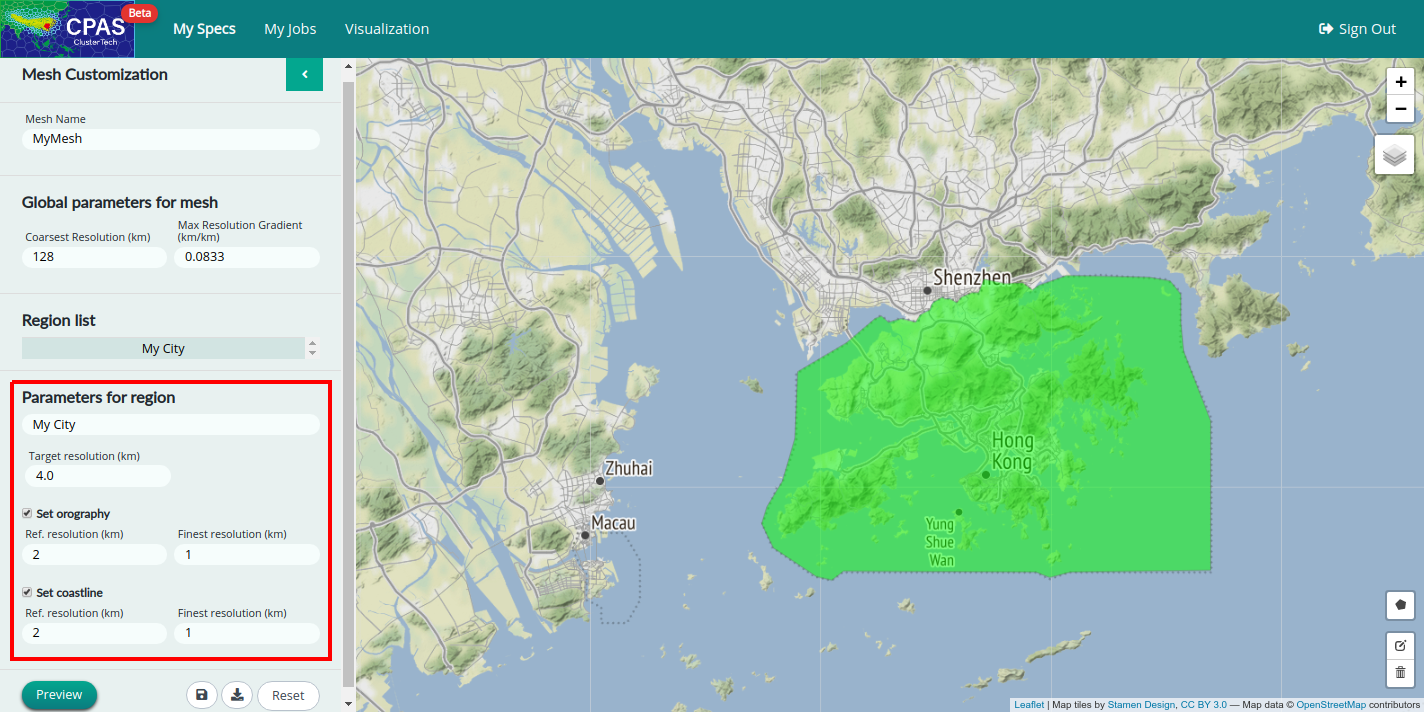
Target resolution (km) - The target distance between cell centers (variable dcEdge in MPAS-A) required within this region. If “Set orography” or “Set coastline” are selected, the resulting resolution will be at least as fine as this Target resolution.
Set orography
The MPAS-A/CPAS model uses terrain height to represent the orography. If this option is checked, resolution will be boosted for mountainous area, and/or where the terrain height changes. Terrain height will be averaged out within a cell and dataset with finer resolution will be used to help representing the reality in the model, which might possibly provide more accurate prediction of wind speed in the lee side of mountains.
| Ref. resolution (km) - Reference resolution for regions with orography. This parameter is used by the algorithm for boosting resolution. Areas with mountain or hill use resolution around this reference resolution. The default value is 0.5 times target resolution. |
| Finest resolution (km) - The finest allowable resolution for orography in the regions. The default value is 0.25 times target resolution. |
Set coastline
If this option is checked, resolution will be boosted for areas near the land-water boundaries, including sea, lake, and rivers. Water has a strong effect on radiation and friction against air flow, finer resolution in the atmospheric model might possibly helps resolve micro-weather details including land-sea breeze and lake breeze, etc.
| Ref. resolution (km) - Reference resolution for regions with coastline. This parameter is used by the algorithm for boosting resolution. The default value is 0.5 times target resolution. |
| Finest resolution (km) - The finest allowable resolution for coastline in the regions. The default value is 0.25 times target resolution. |
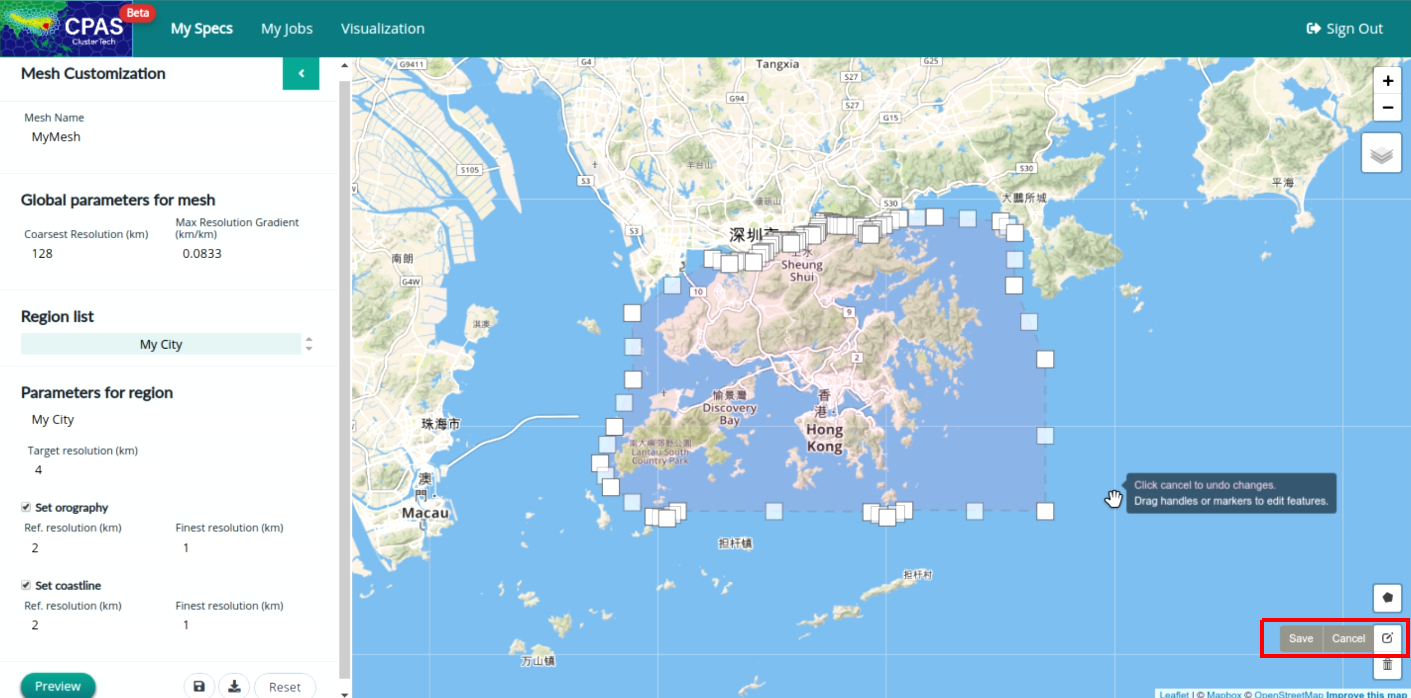
c) Edit the polygons
By clicking the “Edit”![]() button at the bottom right, you can
button at the bottom right, you can
- adjust the position of a point by dragging.
- delete a point by clicking.
- add a point by dragging the faint square in the middle of an edge.
Click “Save” to remember the changes or “Cancel” to revert.
Step 4: Add additional regions for your concern
You can draw more than one polygons with different parameters.
Regions may be nested, i.e. contain another region of interest. This allows shapes and target resolutions to be specified in a layer manner. Alternatively, a mesh containing several discrete regions of interest can also be handled, attributed to significantly greater flexibility of domain configuration for CPAS over WRF.
(If necessary) Delete a polygon - If you click the “Delete”![]() button in the bottom right corner, you will enter the delete polygon mode. Clicking a polygon will remove it from the map. Click “Save” to confirm or "Cancel” to revert. Beware that the “Clear All” button next to the “Cancel” button will delete all polygons and cannot be undone.
button in the bottom right corner, you will enter the delete polygon mode. Clicking a polygon will remove it from the map. Click “Save” to confirm or "Cancel” to revert. Beware that the “Clear All” button next to the “Cancel” button will delete all polygons and cannot be undone.
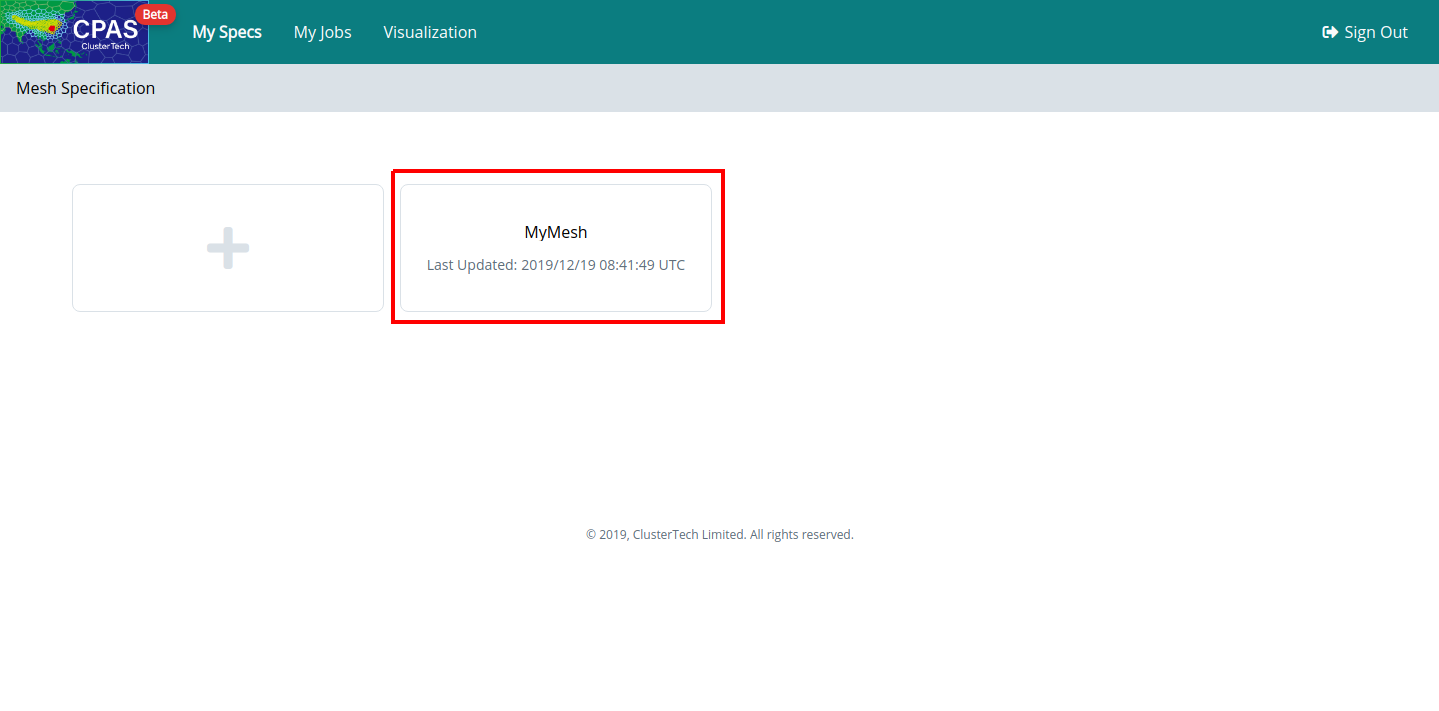
Step 5: Save you mesh specification
The set of regions and parameters specified for a mesh is called a Mesh Specification, or a Spec for short. Save you mesh specification by clicking the “Save”![]() button in the bottom of the left panel. The saved specifications can be found in the “Mesh Specification” page by clicking “My Specs” in the top menu.
button in the bottom of the left panel. The saved specifications can be found in the “Mesh Specification” page by clicking “My Specs” in the top menu.
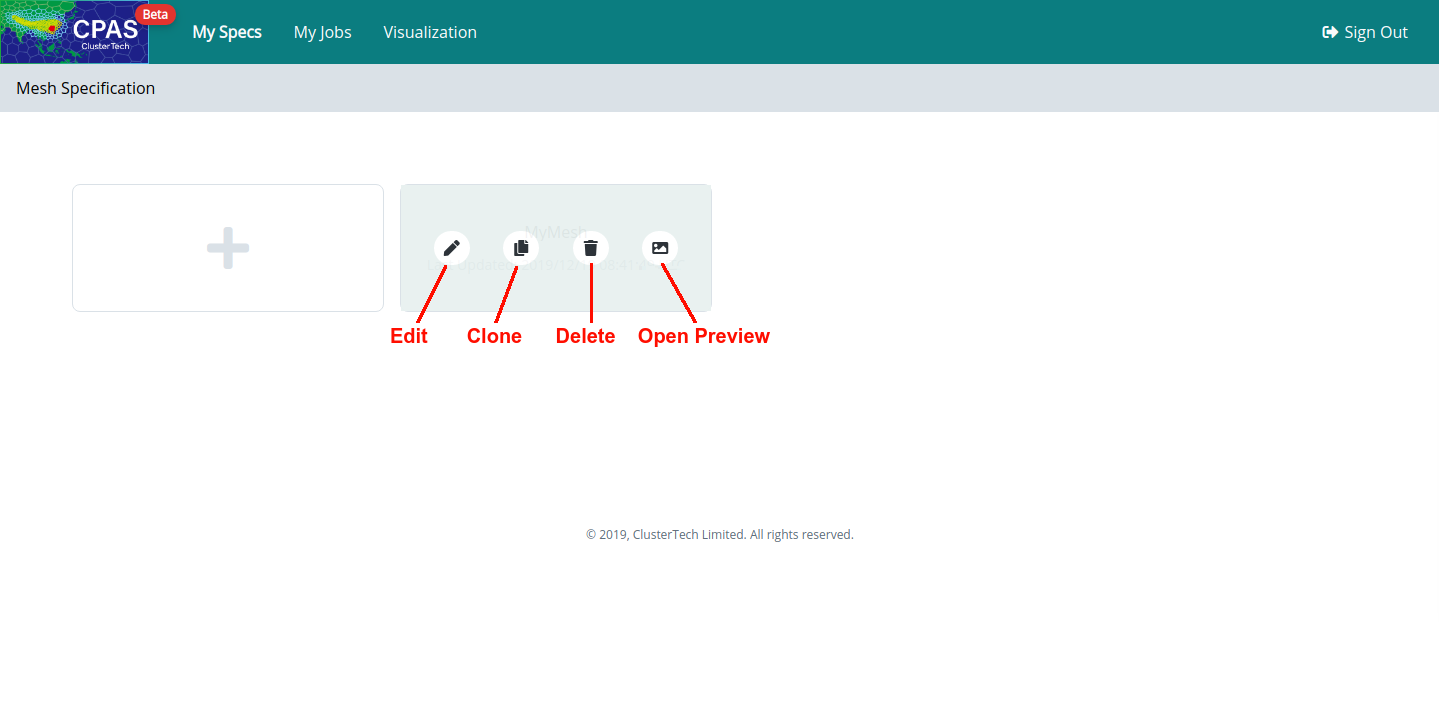
You can “Edit”, “Clone”, “Delete” and “Open Preview” for a saved specification.
| Back to Mesh Customization | Next |